
Create Jira tickets for Violations
Nirmata Control Hub (NCH) allows teams to directly create and manage Jira tickets from policy violation reports, making it easier to track and resolve security or compliance issues. You can also configure automatic rules to create Jira tickets based on violation severity and scope.
Prerequisites
Before creating Jira tickets from Nirmata Control Hub, ensure the following:
- You have administrative access to configure integrations in Nirmata Control Hub.
- You have the necessary Jira project access and credentials (API token or user credentials with appropriate permissions).
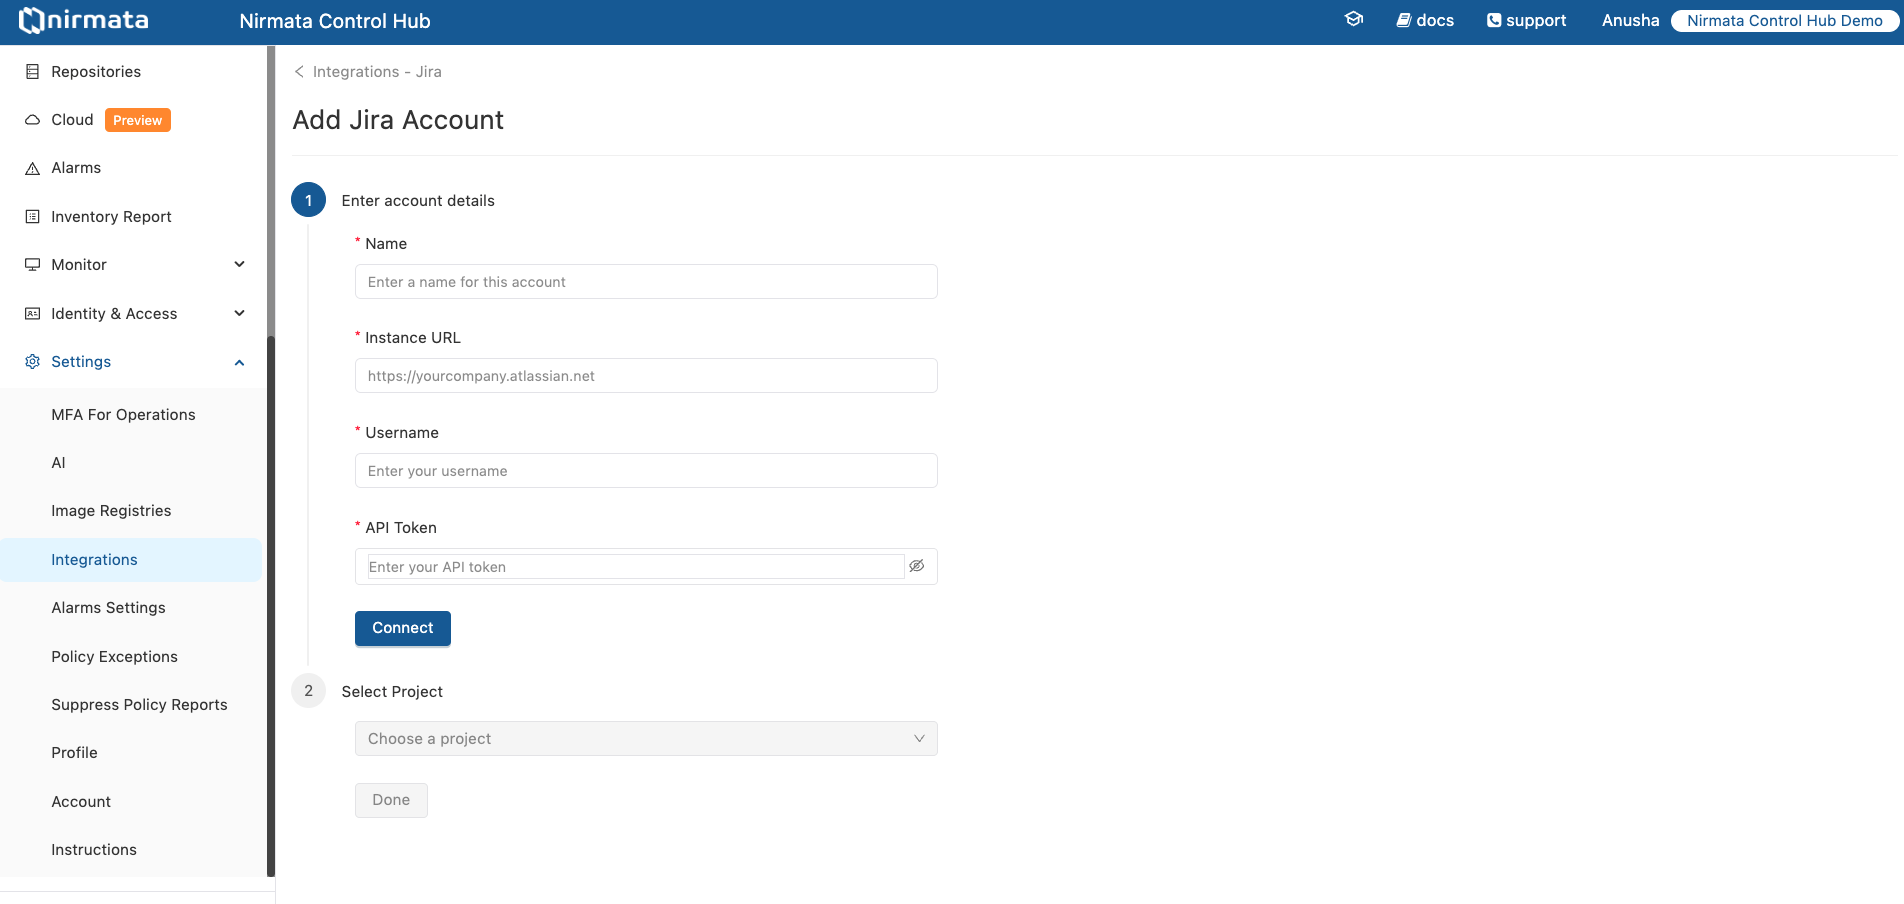
Configure Jira Integration
- Navigate to Settings>Integrations.
- Select Jira from the list of available integrations.
- Click on + Jira Account.
- Enter the required access and project details.
- Click
Saveto validate and store the configuration.
Creating a Jira Ticket Manually from a Policy Report
- Go to Policy Reports>Cluster or Policy Reports>Namespaces.
- Locate the cluster or namespace with violations, for example:
banking-app. - Click
Create Jira Issuenext to the namespace entry.- Any existing Jira issues will be displayed. Click on the Jira link and then click on
Create New Issue.
- Any existing Jira issues will be displayed. Click on the Jira link and then click on
- Fill in the Jira ticket details:
- Namespace or Cluster: Auto-filled with the selected namespace (e.g.,
banking-app). - Project: Select the Jira project where the issue should be created.
- Type: Choose the Jira issue type (e.g., Bug, Task, Story).
- Title: Customize the issue title. The default is Cluster / Namespace violations for
banking-app. - Assignee: (Optional) Assign the issue to a specific Jira user.
- Priority: Set the issue priority (e.g., High, Medium, Low).
- Namespace or Cluster: Auto-filled with the selected namespace (e.g.,
- Click
Createto create the ticket.
A confirmation message will appear, and a link to the Jira issue will be displayed. The ticket will also include a summary of violations detected for the cluster or namespace, allowing development or platform teams to take corrective action.
Configuring Automatic Jira Issue Creation Rules
You can define rules for automatic ticket creation based on policy violation severity and target scope (e.g., cluster or namespace). This helps streamline ticketing workflows and ensure timely tracking.
- Go to Settings>Integrations>Jira.
- Select any Jira account.
- Select the
Rulestab. - Under
Automatic Jira Issue Creation Rules, configure your rule:
- FOR EACH: Select the target scope (e.g., Cluster or Namespace).
- WHERE: Define filter conditions such as
Severity in Medium. - CREATE: Choose the issue type (e.g., Task), set
Priority, and assign the issue.
- Click
+to add multiple rules or conditions. - Click Save to enable the rule.
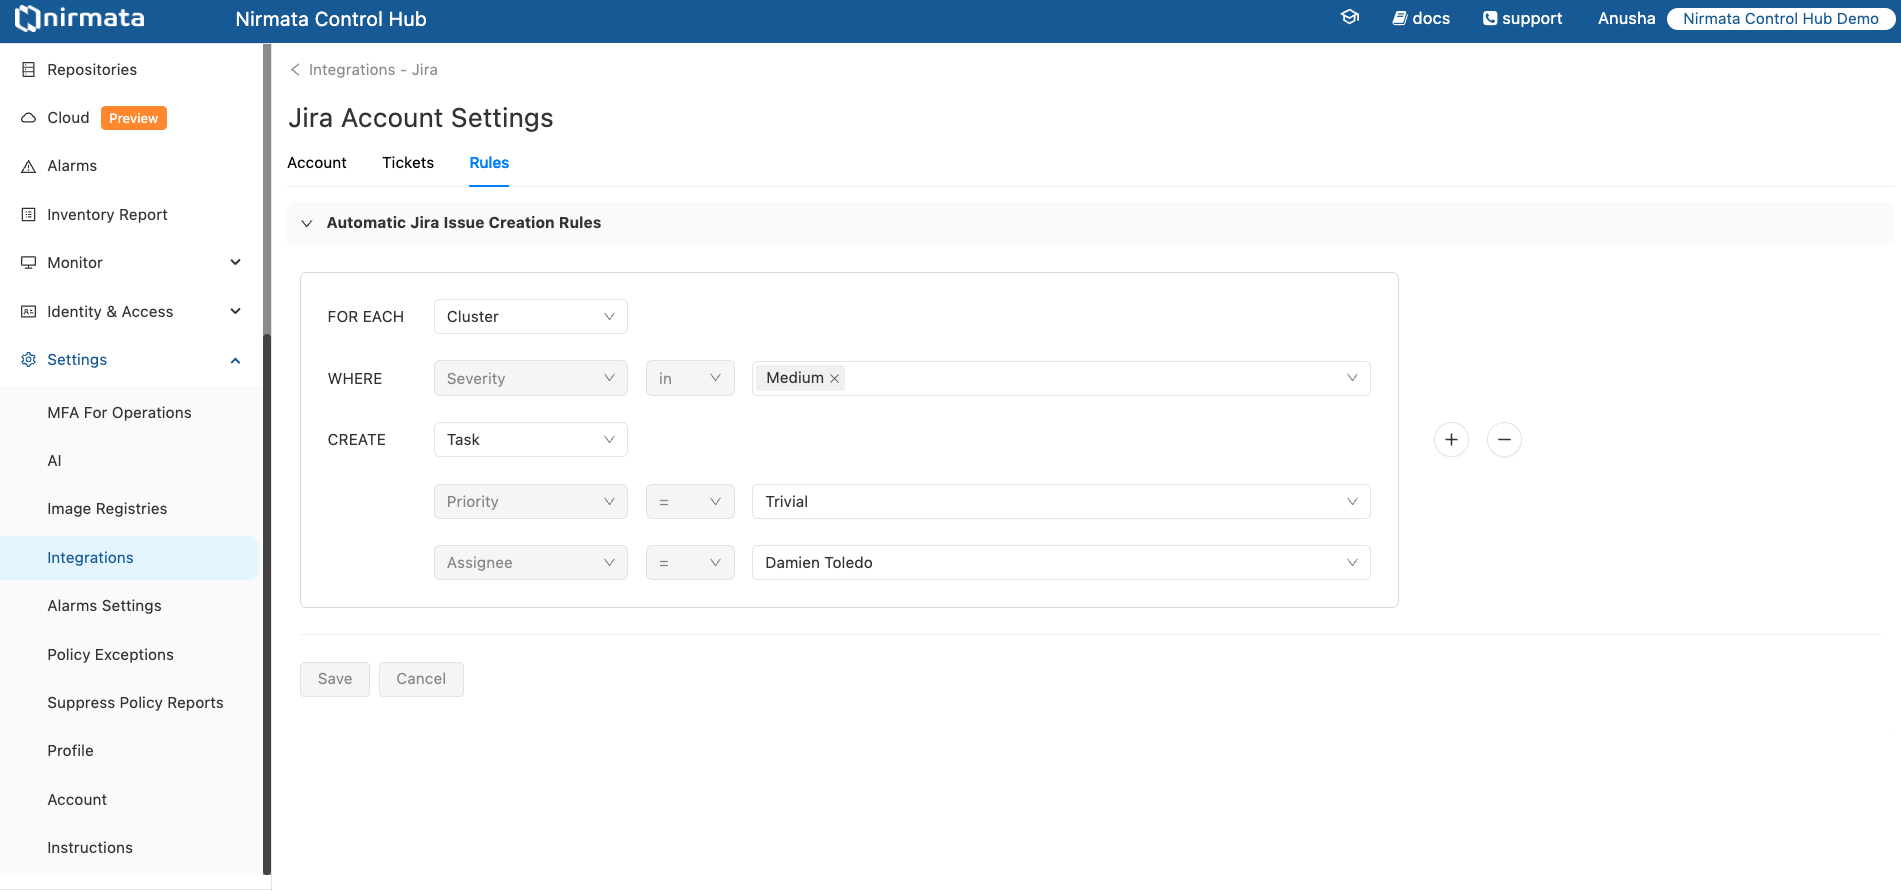 In the example above, the system is configured to:
- Create a Task for each Cluster where Severity is Medium.
- Set the ticket Priority to Trivial.
- Assign the ticket to Damien Toledo.
Benefits
- Seamless Integration: Avoid context switching by tracking policy issues within Jira.
- Automated Tracking: Ensure that policy violations are not missed and are tracked to closure.
- Team Collaboration: Assign violations directly to responsible teams with all necessary context.